部署
刀刀
0字
0分钟
2026/8/13
gitee 部署
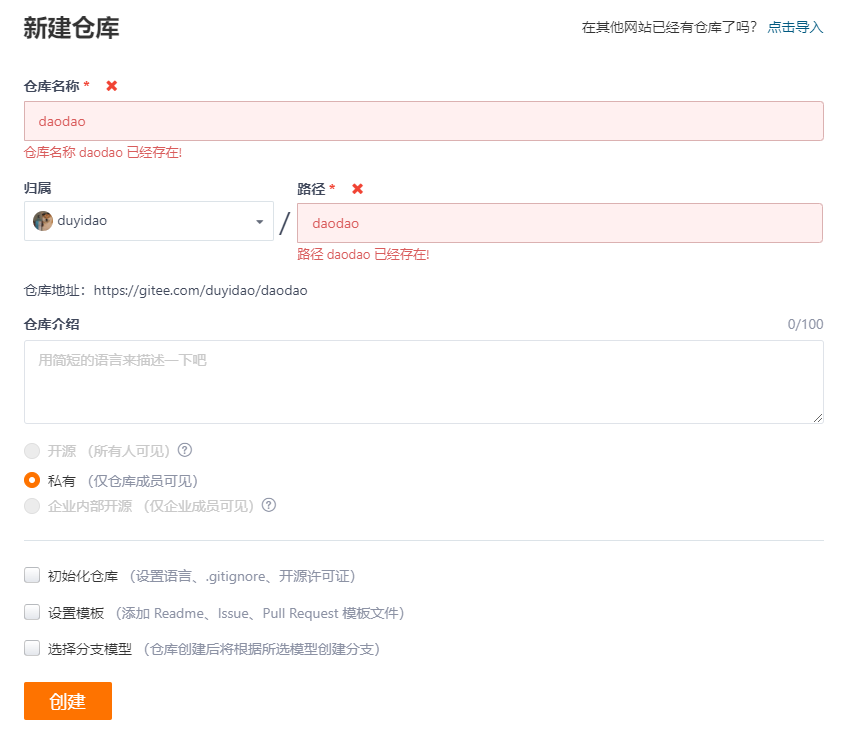
创建仓库
重点:
- 如果第二阶段打包时
base参数为/,仓库名称应为gitee用户名.gitee.io。(以我的账号为例,应为duyidao.gitee.io) - 如果参数为
/一个单词/,仓库名称也要取对应的名称。(如第二阶段我的代码是base: '/daodao/',仓库名称如下图所示)
设置开源
把仓库设为开源
选择 Gitee Pages 服务
点击服务选择 Gitee Pages 服务。

选择分支 本次项目只有一个主分支,不用操作。
选择部署目录 如果上传时上传的是整个
vitepress文件夹,此时要设置部署的目录:docs/.vitepress/dist。如果单独上传打包好后的dist文件夹,则不需要做其他设置,默认以整个仓库为基准路径。
最后打包成功后,会给一个链接,复制打开即可看到成品。
github 部署
手动部署
在创建好的仓库点击 Setting,找到 Pages,调整 Branch 设置:
- 选择
main分支,这里是主分支,因此默认main - 选择部署文件,这里是直接上传打包后的内容,因此文件夹选择
root根文件 - 点击
save,等待部署成功即可
若没有看到选择分支的下拉框,则先切换 Source 下拉框再切换回来即可。 
流水线自动部署
想要实现流水线自动部署,需要在项目根目录下新建一个 .github/workflows 文件夹,并在该文件夹下新建一个 deploy.yml 文件,内容如下:
点击查看
yml
name: Deploy VitePress site to Pages

on:
  push:
    branches: [master]
  workflow_dispatch:

permissions:
  contents: read
  pages: write
  id-token: write

concurrency:
  group: pages
  cancel-in-progress: false

jobs:
  build:
    runs-on: ubuntu-latest
    steps:
      - name: Checkout
        uses: actions/checkout@v4
        with:
          fetch-depth: 0
      - name: Clean node_modules and package-lock.json
        run: rm -rf node_modules package-lock.json
      - name: Install dependencies
        run: npm install
      - name: Setup Node
        uses: actions/setup-node@v4
        with:
          node-version: 20
          cache: npm
      - name: Build with VitePress
        run: npm run build
      - name: Upload artifact
        uses: actions/upload-pages-artifact@v3
        with:
          path: docs/.vitepress/dist

  deploy:
    environment:
      name: github-pages
      url: ${{ steps.deployment.outputs.page_url }}
    needs: build
    runs-on: ubuntu-latest
    steps:
      - name: Deploy to GitHub Pages
        id: deployment
uses: actions/deploy-pages@v4贡献者
 duyidao
 v_duyilin 刀刀
 laowang